Arctic Chat : Arctic Cat Forum banner

Finders Keepers- Or the 580 Refresh Tread

3.5K views 19 replies 8 participants last post by  Kilabeez0  
#1 ·
Good day to all,

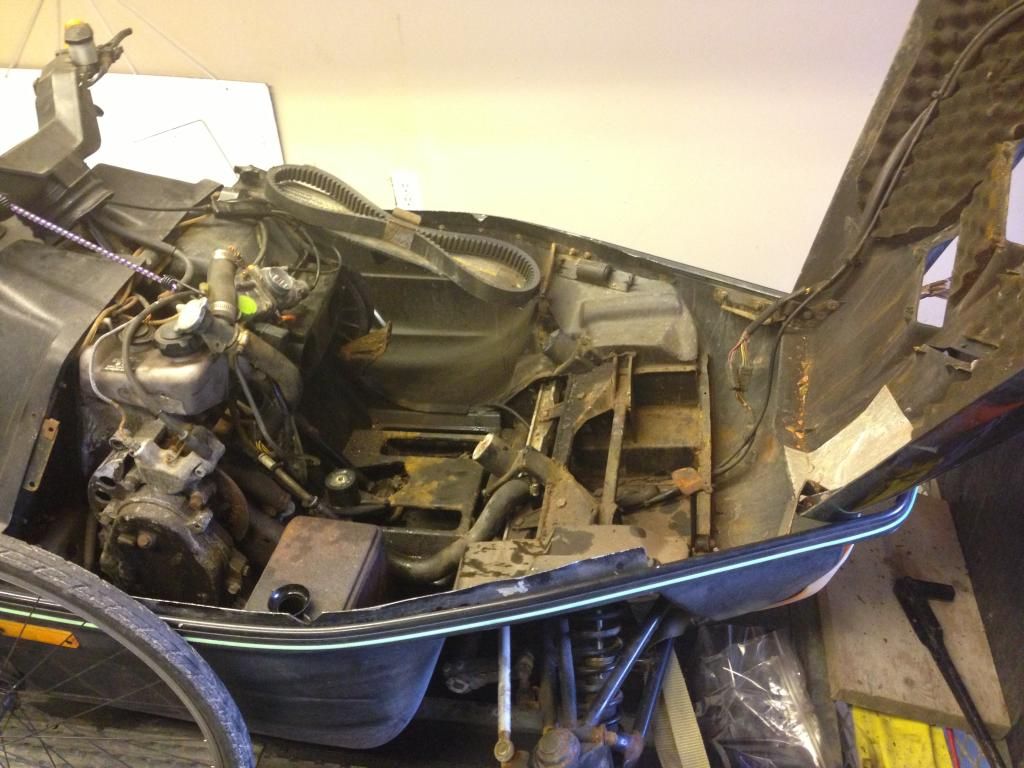
Its been close to 3 years since I resurrected a sled that was given to me for free.... a 1994 EXT 580 EFI (that got converted to CARB with a ZR hood)

Back then, I simply got it running, got the basics like drive belt and fixed the wiring after the sled was sitting outdoors for 9 years.

I figured lets see how long it lasts and every day is a bonus.

Since then my dad has been using it every winter for his ice fishing trips, towing a little sled and using it with a passenger almost every weekend... 3 seasons in! All we had to do is replace the drive belt again and rear shocks.

This time around, decided its time for a top end as even 3 years ago I saw scratch marks on the pistons through the exhaust ports.

So he we go..... The engine is out, cylinders are off for cleaning and Im about to order the SPI pistons/rings/bearing/gasket kit for the top end.


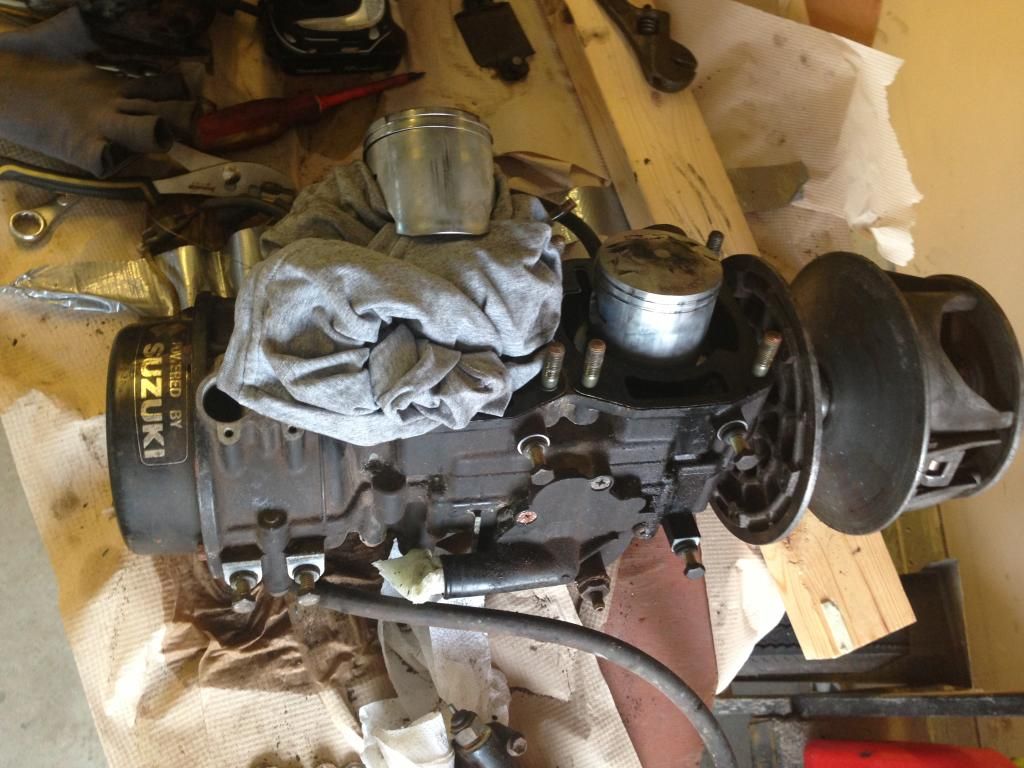
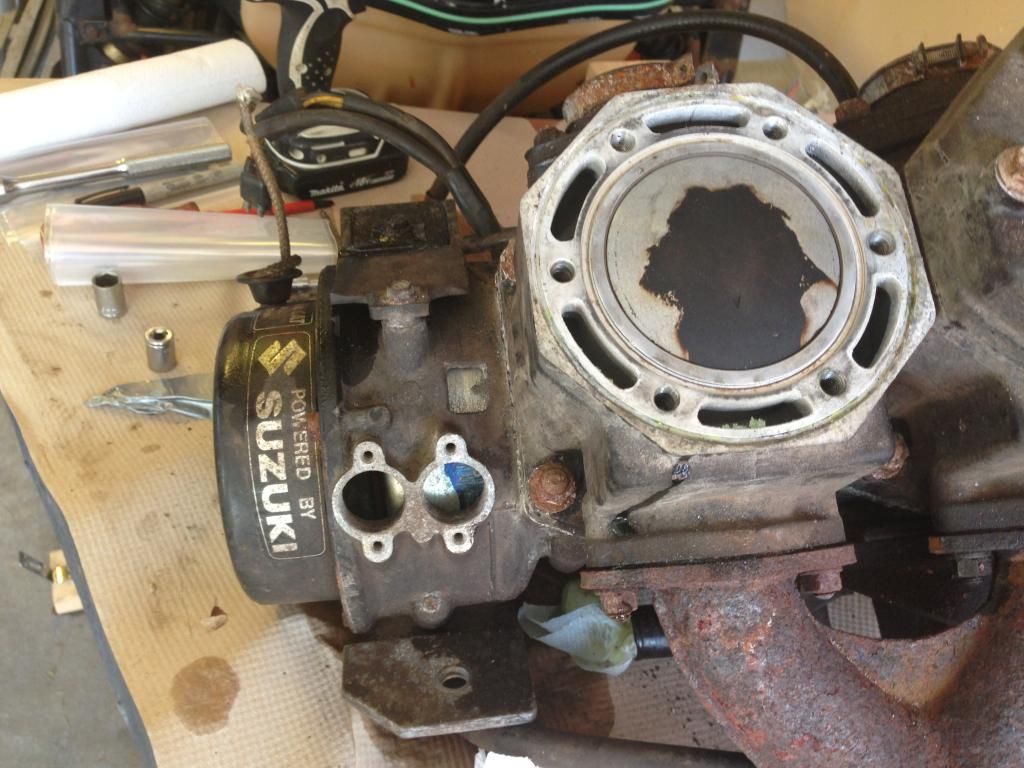
The good news is that the scuffs on the pistons are not too bad, there is no dings or real bad scratches on the cylinder walls either.


What I need help with, is reminding me how to check for signs of bottom end problems and to find out if I need to split the bottom (never done it) and to replace the bearings on the crankshaft (anything else there wears out?)

The sled will nee an overall cleaning and touch ups... which I will proceed with based on the health of the engine and bottom end.

Your help and advice is appreciated. (never done a snowmobile rebuild, just a few top end on dirt bikes)

Thanks in advance.Cat happy
 
#7 · (Edited)
Piston wash...

1994 EXT 580 EFI ( that got converted to CARB )


Your help and advice is appreciated. (never done a snowmobile rebuild, just a few top end on dirt bikes)
You are running too RICH due to the look of your piston crown.


Quote: DynamoJoe
Remember:
***Carbon only sticks to a HOT piston***
We do jetting so that the dome is covered in that light grey/brown color... covered in carbon.
For correct piston wash the piston must be nearly completely covered in carbon.
The 4 little fingernail size ''White'' areas are where the carbon is Washed off due to piston cooling being the greatest in that area.
If there were no fingernail size areas and the top of the piston was total covered in carbon, the engine would burn down from being too lean.
The bigger the fingenail ''white'' areas get, the more RICH the mixture is.
Fuel is great to keep the piston cool so there is more carbon ''washed'' away at the transfer ports.
 

Attachments

#8 ·
I'm rebuilding a 580 also
one thing on the carbs look up a google search for "baking soda" blaster for carbs, i bought ebay pistons 100.00, gasket set 55.00, for bearings the crank bearings are spendy , its cheeper to send the crank to northern crank repair and get it trued also, and buy yamabond crank sealant , look for cracks in the y pipe and boil the clutch also, , i also electrolysis cleaning my pipe and y to repaint them, all the rust come off them using a tub of water and a little baking soda, and a battery charger , with two metals in the water , i found it on youtube ,works good
 
#9 · (Edited)
Here is a long awaited update to this thread, I actually let the snowmobile sit all winter apart (went back to university and had no time to do much)

So my timing sucks, but with my teachers on strike now, I had time last weekend to put the top end back together and install the engine back in.

:wacko:


Hope this oil pump arm looks properly installed (slack looks quite big when at rest-but fully open when throttle is wide open)


I actually got it started for a few seconds, but it revs up to the moon and I had to shut it down quick- the intake rubber boots seem fine (I inspected them really well when they were off).

When I pull the chokes (brand new plungers an cables were installed [were seized up when I took it all apart]) the engine RPM comes down to a normal low idle, overly rich, bogs when throttled with the chokes on)

So i'm thinking Air leak?
Or did I messed up cleaning the carbs and its now somehow doing that? (I did not touch the throttle screws at all, still at the same rusted spot as when I took it all apart)
Or maybe there is something else im not thinking of?

PuzzledI dunno

Can someone tell me/show me (picture) the slide of the carb on a 580 at rest? how much is it open for idle?
 
#10 ·
Yep,air leak OR I'm thinking your carb slides are not all the way down. Make sure they are installed right and Iv'e seen the needles hold them up if not in the needle jet right. Do you have play in the throttle,maybe the cables are set to tight(short) and holding them up.
 
#11 ·
Wow! That rust remover did an awesome job. It's hard to read the bottle "Evapo Rust"? I'm doing some work to my sled this off season. I'll have to get some.


I agree with the above poster on the slides. Check the slide adjustment screws on both carbs. I'm betting their turned all the way in.
 
#12 ·
The evaporust did ok (better than I thought-on the bolts and bits), you just soke it in for 24h or more. After that I still wired brushed to shine it up, so don't think it comes out that way:)

I actually checked the idle screws and all the carbs and still getting the high rpm starts.

If I remove the idle screws completely, and disconnect the throttle cables completely, are the slides in the carbs going to block the carb passage fully? Is that what's suppose to happen!?
 
#14 · (Edited)
Didn't have any time to work on it, but today I went in to take off the carbs and see how far the slides would go down in the carbs if I were to discionnect the throttle cable all together.

I didn't even get to put it back together and think I found the cause of the high idle - 99% sure it is the reason.

Unfortunately, I was called back to work and had to take off and no time to reinstall and test.

So.... The reason for the high idle would seem to be in the partialy opened up slides in the carbs (cables not stuck- not are they cought up on anythin)- the cables have two bulbs on the end and I hooked the slides on the 2nd one from the short end- hence pulling the slides up 1/4 inch higher than the bottom notch on the cable would.
 
#17 ·
I wanted to make sure that the new choke cables and plungers were sealing off the choke passage completely when closed off- so not to suck in air/fuel when not needed.

So I measured the dept of the plunger cavity and came up with a measurement of 1-1/16"


Then I measured the choke assembly from the bottom of the plunger to the top of threads (with choke off) and adjusted the lock nuts to make this measurement 1/8" longer than the cavity dept= 1-3/16".


Just to verify I sprayed carb cleaner in the choke passage with the plunger closed- it came back flying in my face and nothing made it through past the plunger. Cat happy